UConnect Tip Sheets

Main Content

UConnect for a Windows Device

JOINING UCONNECT WIFI ON A WINDOWS DEVICE WiFi Icon

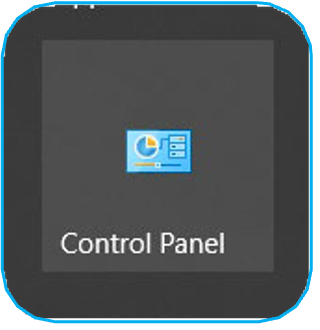
Select Control Panel > Wi-Fi > "UConnect" wireless network

Computer screen showing the Control Panel icon with a pie chart graphic and the label "Control Panel."

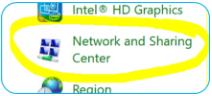
Select Network and Sharing Center

Screenshot of computer settings menu with "Network and Sharing Center" highlighted, and "Intel HD Graphics" and partial "Region" text visible.

If you have previously attempted to connect to this network unsuccessfully, please right-click on and "Forget the network".

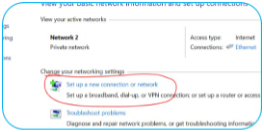
Select Set up a new connection or network

Network settings window showing "Network 2" as a private network with internet access, and the option "Set up a new connection or network" circled in red.

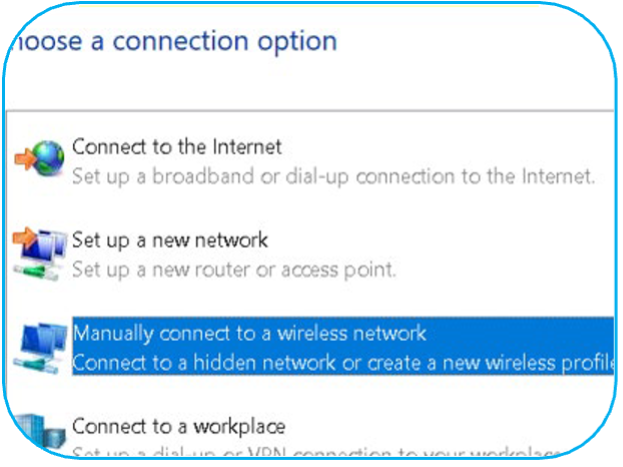
Select Manually connect to a wireless network (note: case and character specific)

Screenshot of network setup menu with options to connect to the internet, set up a new network, manually connect to a wireless network (highlighted), or connect to a workplace.

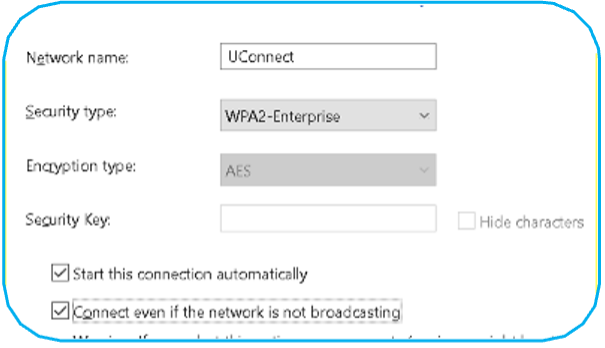
Enter UConnect for name and select WPA2-Enterprise Security type, and then next.

Wi-Fi configuration screen for network "UConnect" with WPA2-Enterprise security, AES encryption, and options to auto-connect and connect even if not broadcasting.

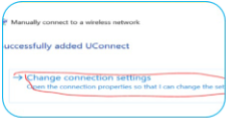
You are now connected to UConnect. You will be prompted to change your Certificate and authentication settings by selecting Change connection settings.

Screenshot showing successful manual connection to wireless network "UConnect" with an option to change connection settings highlighted.

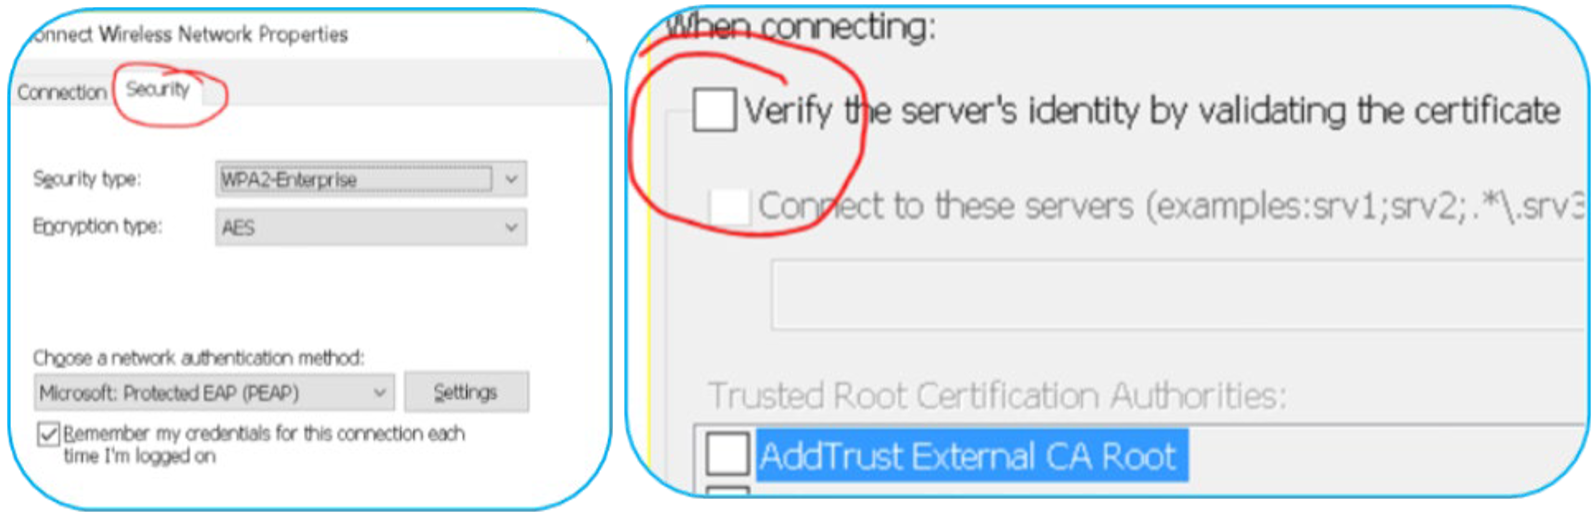
Select the Security tab and then Settings under network Authentication method. Unselect Verify the server's identity by validating the certificate. Select OK.
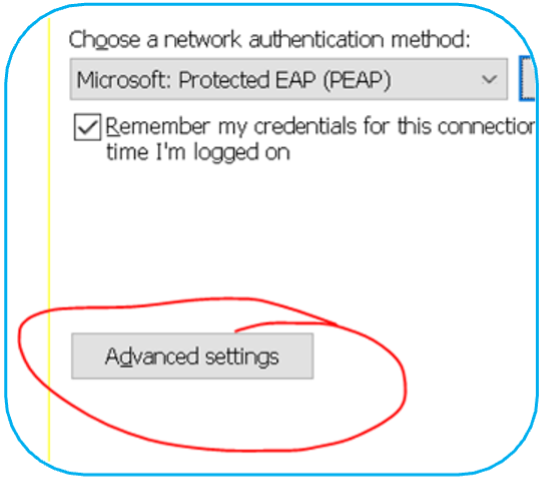
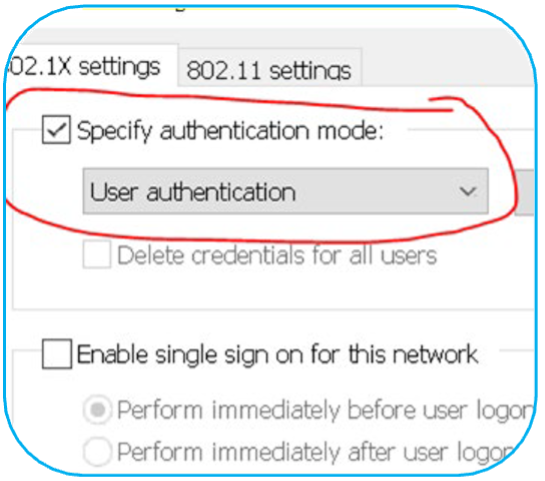
Two screenshots of Wi-Fi security settings showing WPA2-Enterprise with AES encryption, PEAP authentication, and unchecked certificate validation with AddTrust External CA Root selected.

Now select Advanced settingsĀ and change Specify authentication mode to User authentication. Select OK.

Network authentication settings window with PEAP selected, "Remember my credentials" checkbox checked, and "Advanced settings" button circled in red.Network settings screen showing 802.1X authentication mode set to "User authentication," with options for deleting credentials and enabling single sign-on.

You should now be able to go to your list of networks and select UConnect. Enter your credentials to connect.


If you are experiencing issues with UConnect, please contact our Help Desk at (601) 984-1145.

Revised 8/2025

*Subject to Change depending on UMMC modified Business Processes

The PDF of this tip sheet is available on the UMMC Intranet (login required) under DIS > Technology Learning Central > TLC Resources Pages > UConnect.

Back to Application Resources Page